Placing Nodes
Treemble lets you mark every tip, internal, and root node so it can reconstruct the full topology.
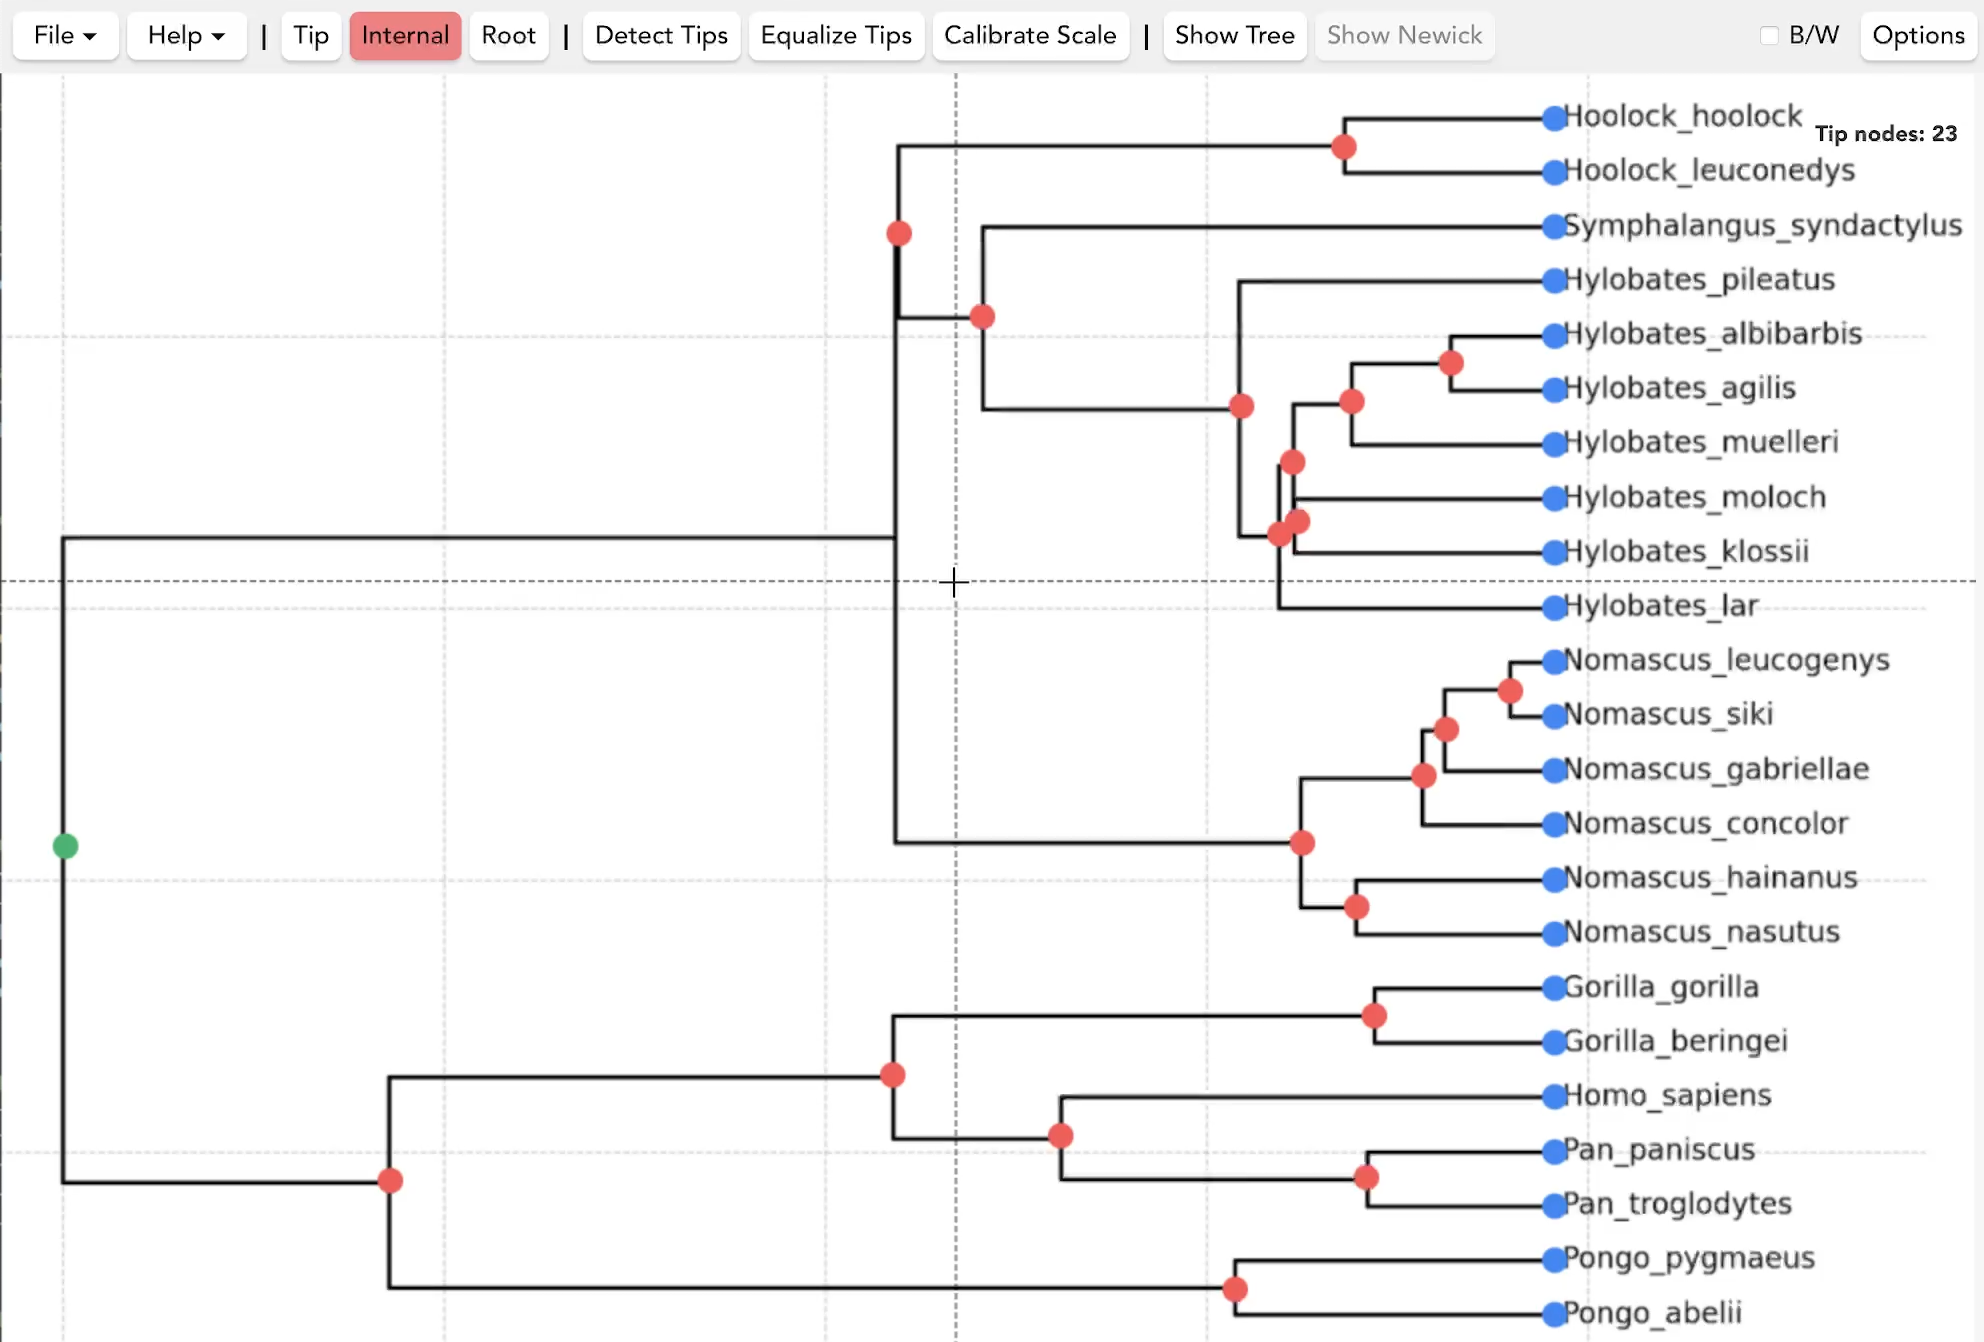
1. Select a Node Tool
| Tool | Toolbar Button | Purpose |
|---|---|---|
| Tip | Tip button | Terminal leaves |
| Internal | Internal button | Marks a splitting of branches |
| Root | Root button | Single common ancestral node |
Note: Click the same button again to exit the tool. When no tool is selected you can click the left mouse button and drag to pan around the image (this always works for the right mouse button even when you are in a tool mode).
2. Add or Remove a Node
- Move the cross-hair over the desired pixel location.
- Click once to add the node.
- Click the node again to remove it.
Note: There can only be one root. If you click a second time with the root node tool, it will move the root to the new position.
Left click and drag to fine-tune a node’s position.
Undo / Redo
Mistakes happen! You can undo and redo node operations:
- Ctrl+Z (or Cmd+Z on macOS): Undo the last node operation
- Ctrl+Y (or Shift+Cmd+Z on macOS): Redo the last undone operation
This works for adding, deleting, moving, detecting, and equalizing nodes.
3. Automatic Node Detection
Treemble can automatically detect nodes using computer vision and deep learning models.
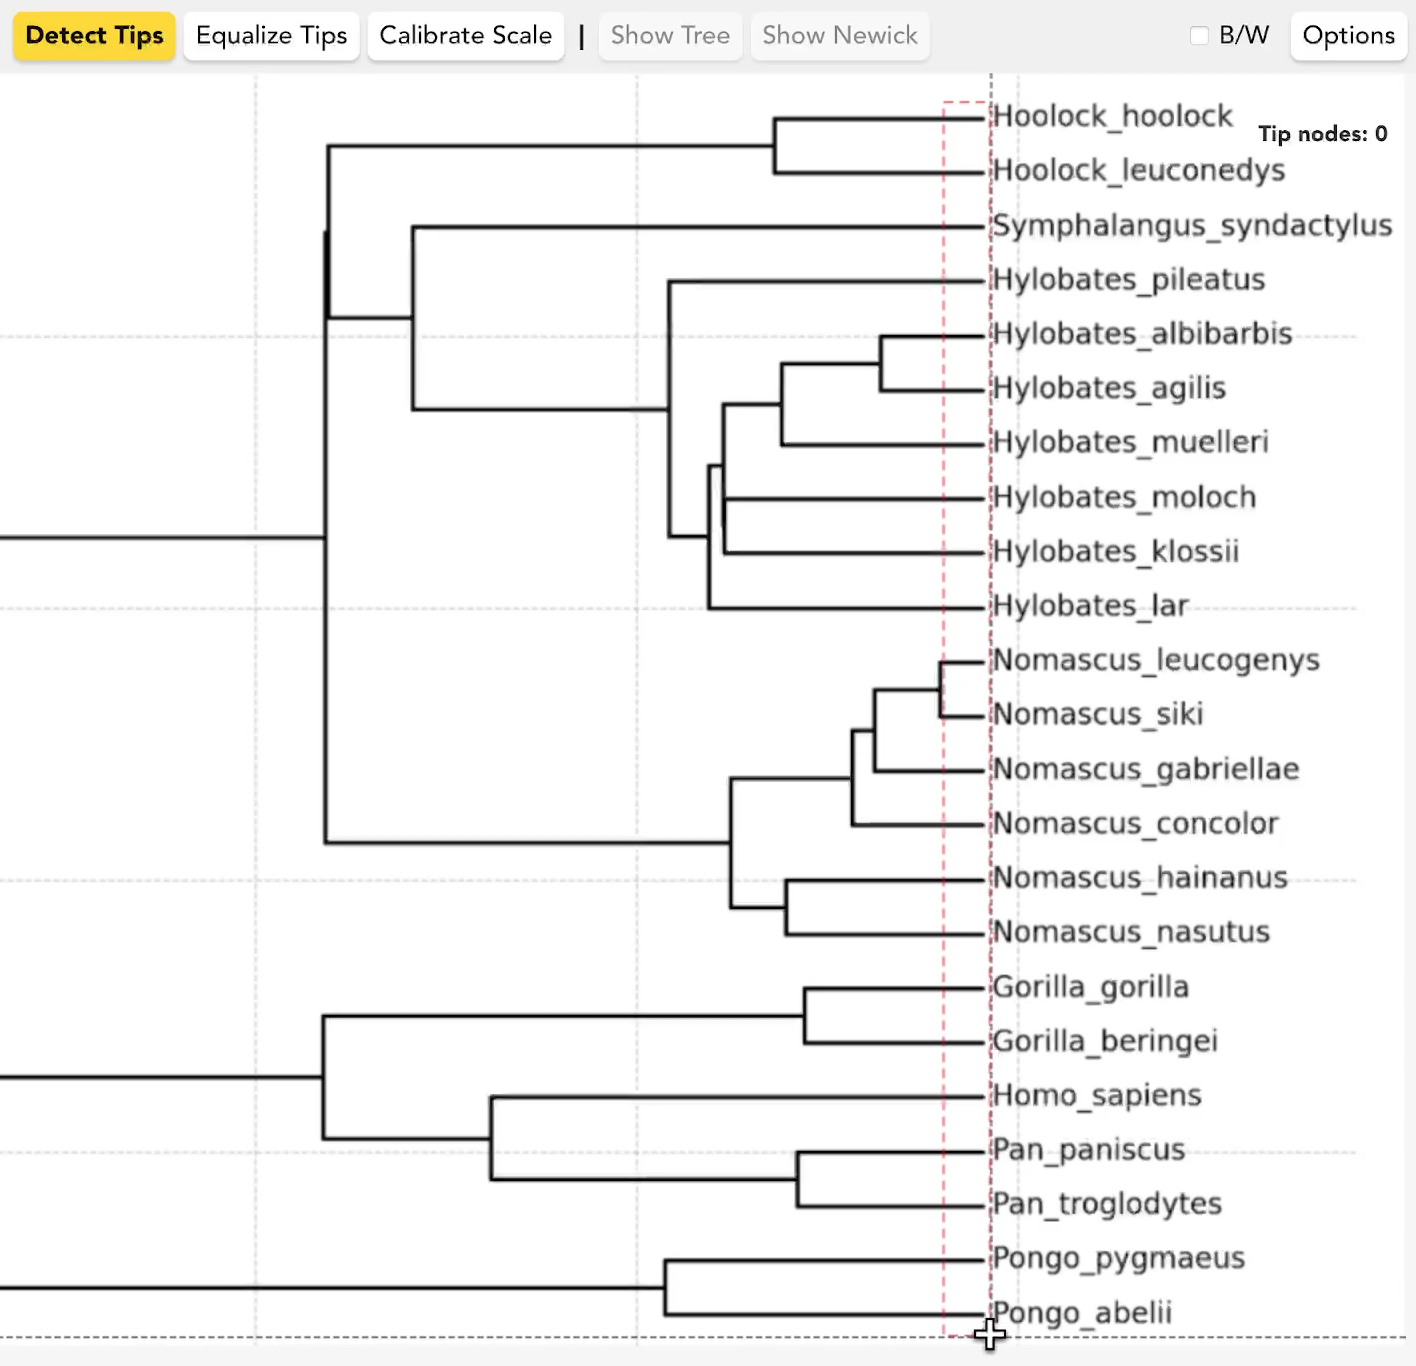
Detect Tips
Bifurcating trees always have 2n - 1 nodes where n is the number of tips, so the tips are more than half of the nodes! Treemble will automatically detect them for you and add tip dots at their locations. Just click Detect Tips in the tool bar and drag a rectangle around only the tips, then release the mouse button and node dots will appear. Don't include text or internal node locations in the selection rectangle.
Detect Internal Nodes
Treemble also includes a Detect Internal feature that uses a specially trained deep learning model to find internal nodes (branch points) in your tree image. See the Internal Node Detection page for full details.
4. Equalize Tips
The Equalize Tips button will allow you to click a point on the image to set the X-axis coordinate of all tip nodes X-axis position. This is useful if you are creating a newick for a time-calibrated tree that should ultrametric.